
STEP 01
Decide where the image will appear
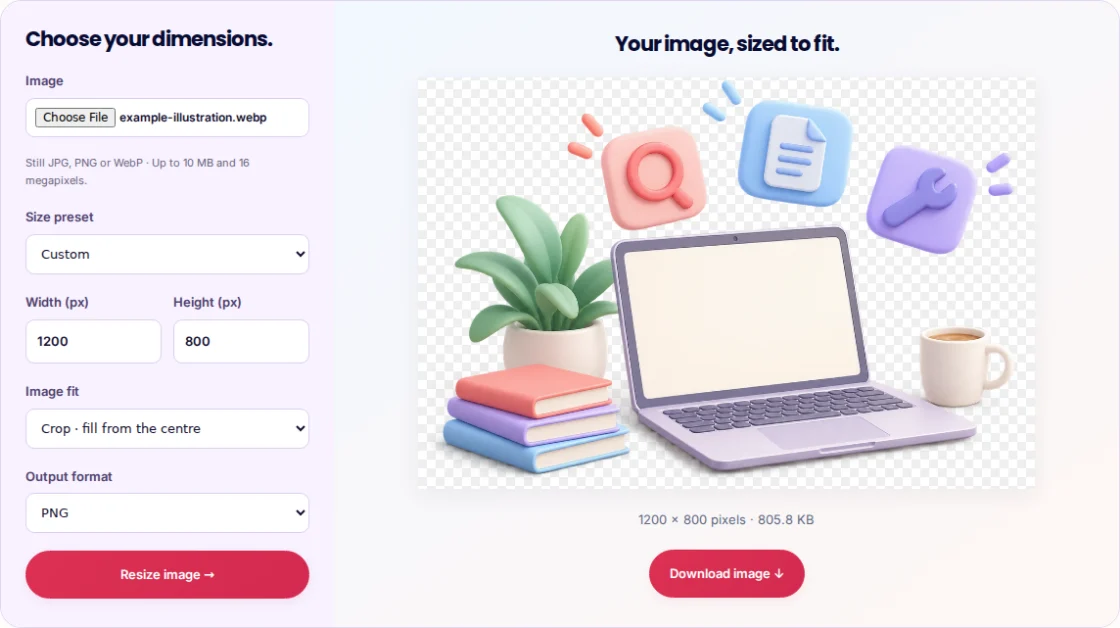
Find the shape and dimensions your website needs before processing the source. A wide article banner and a square product tile are different jobs. In Image Resizer, set the width and height in pixels. Fit keeps the full source with extra space where needed; Crop fills the canvas by trimming around the centre. Check faces, text and product edges before downloading. Stretch changes proportions, so use it only when that distortion is intentional.
STEP 02
Compress the final composition
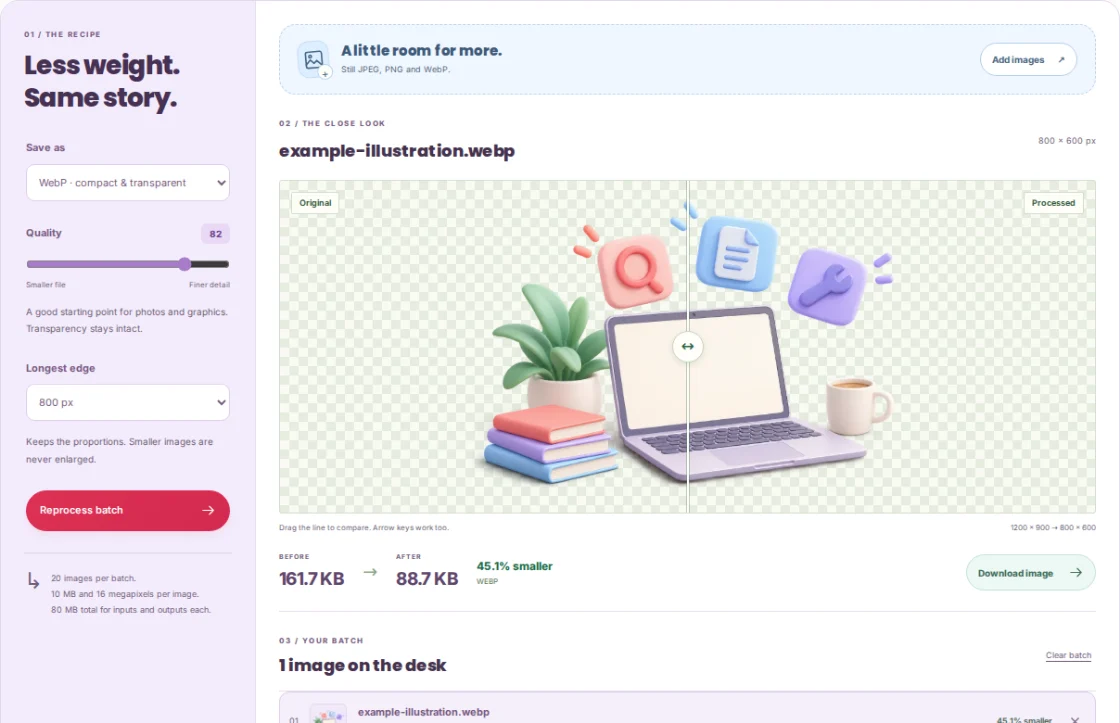
Download the resized result, then open it in Image Compressor. Start with WebP or JPEG for a photo, and consider PNG or a suitable WebP output when transparency matters. Try one lossy quality setting, compare fine detail at the intended display size and review the actual output bytes. A preset cannot guarantee a particular file size. Keep the original so you can try a different crop without repeatedly recompressing an edited copy.
STEP 03
Check the uploaded result
Open the downloaded file and confirm dimensions, transparency and visible detail. After uploading, check the actual page on desktop and mobile: the website may crop or resize the image again. Neither tool updates your CMS, writes alt text or generates a responsive HTML image setup. Add an appropriate text alternative in the website itself when the picture conveys information. If the upload screen has a byte limit, compare against that exact limit rather than the dimensions alone.
An example to work from
Source: 4000 × 3000 product photo
Needed: 1200 × 800 banner
1. Crop in Image Resizer and review the product edges.
2. Download the resized result.
3. Compare WebP quality settings in Image Compressor.
4. Check the actual file size and the uploaded page.
PUT IT INTO PRACTICE
Prepare a product photo for a 1200 × 800 banner
- A fictional 4000 × 3000 photo has a centred product. Set 1200 × 800 in Image Resizer and choose Crop. Check that the product and its important edges remain inside the canvas.
- Download the result and add it to Image Compressor. Start with WebP at quality 82, then inspect the product label and fine edges. Try another quality only if the comparison warrants it.
- Download your chosen result, open it and upload it to the page. Check the website’s desktop and mobile crop, and add suitable alternative text in the CMS.
GEOMETRY
Source ratio: 4:3
Output ratio: 3:2
Crop keeps the output filled, trimming some source height.

QUALITY REVIEW
Look at: lettering, fine edges, transparent areas
Compare: actual output bytes, not an assumed percentage saving
Keep: the original source and the chosen final file
The dimensions and starting quality are illustrative. The actual file size depends on the image, the chosen format and browser encoding. JPEG cannot preserve transparency.
Common mistakes to avoid
- Compressing before deciding the final crop
- You may discard detail in pixels you later remove. Start from the original and set the composition first.
- Choosing PNG solely because it looks crisp
- It can produce a large file for photographs. Compare a suitable lossy format at the intended display size.
- Equating fewer pixels with a guaranteed upload size
- Pixel dimensions and encoded bytes measure different things. Check both when the destination specifies both.
Before you finish
The best output is small enough for its use while still showing the information the image is there to communicate.
- The canvas dimensions match the placement.
- The subject is not distorted or unintentionally cropped.
- The chosen format handles the required transparency.
- Important detail has been compared.
- The actual downloaded byte size is acceptable.
- The uploaded desktop and mobile appearance has been checked.
Further reading
Official references for the topics covered in this guide.